Showing posts with label condiments. Show all posts

Tuesday, 12 November 2013

How to make sauerkraut at home?

cabbage after one week of fermenting - crunchy yet with distinctive sauerkraut flavour already, more photos to follow soon


Homemade sauerkraut is a world apart from the stuff that comes from the shop in jars or plastic bags. The real thing that you can buy in Poland (I am sure Czech, Slovakia, Russian, Germany and more too) from a butt (barrel?) tastes so much better than the jar stuff I buy in UK. So I decided (finally!) to make my own following my Mum's and Granny's advice. My partner and I both agreed that this was one of the best ones we ever ate. Come on winter! We no longer should have an immune problems, good bye colds (hopefully!), but to be honest for me what is the best is the flavour of sauerkraut - you cannot beat it. Have you tried and liked kimchi? Then you should try sauerkraut. 

What is sauerkraut? 

Directly translated it is indeed "sour cabbage". To be more precise finely cut cabbage that has been fermented by various lactic acid bacteria therefore very good for your health. It has a long shelf-life and a distinctive sour flavor, both of which result from the lactic acid that forms when the bacteria ferment the sugars in the cabbage.

Autumn cabbage is the best for making sauerkraut


Why it is good for you?

It is extremely high in vitamins C, B, and K; the fermentation process increases the bioavailability of nutrients rendering sauerkraut even more nutritious than the original cabbage. It is also low in calories and high in calcium and magnesium, and it is a very good source of dietary fiber, folate, iron, potassium, copper and manganese.

If unpasteurized and uncooked, sauerkraut also contains live lactobacilli and beneficial microbes and is rich in enzymes. The fiber and supply of probiotics improve digestion and promote the growth of healthy bowel flora, protecting against many diseases of the digestive tract.

Sauerkraut is high in the antioxidants lutein and zeaxanthin, both associated with preserving ocular health.


Can you prepare sauerkraut at home? 

YES! 

This is what you need:

- white cabbage, preferably during Autumn time (this is what Gran told me - earlier cabbages don't taste as good)
- good quality natural salt (with no additives such as anti-caking agents) - about 10-20 grams for every kilogram of fresh cabbage
- carrots, firm sour apples, caraway (seeds or ground) - OPTIONAL, for extra flavour 
- possibly a stoneware but glass jar will be good too for small batches (my Great grandmother use to make it in a wooden butt, but she had one and a special space for it, also a much bigger family to feed than we nowadays)
- mandoline or a food processor with shredding attachment (unless you want to cut it with a knife)


How?

Work in fairly clean environment - you want good bacteria to do their job, so clean the worktops and the container you will be making sauerkraut in. 

First remove outer leaves from the cabbage and discard any wilted, limp outer leaves. Cut in half and in quarters then trim out the core. Some people use it, but it has to be very finely shredded - so it is up to you, you may as well leave it just to make sure it is shredded finely than the leaves.

Using a mandoline or a food processor shred the cabbage into fine ribbons. At this stage you can place them in a container that will be used for fermenting or in something else for a time being (and mixing with salt). I place it in a large clean plastic bowl.

Sprinkle the salt over the top of the shredded cabbage. If you making a lot of it (like me - 8kg of cabbage in one lot) it would be beneficial to sprinkle salt over few layers of cabbage as you shred it. 

Next begin working the salt into the cabbage by massaging and squeezing the cabbage with your hands, wooden rolling pin or... clean feet. Yes, this is fun! :) The main purpose for this is to get some juices out of the cabbage. Gradually, the cabbage will become watery and limp. It is time to add whatever you want to add for extra flavour, or you can leave it as it is. 

shredded cabbage

For 8kg of cabbage I used 2 large carrots (peeled and grated), 3 firm sour apples and about 3 tsp of ground caraway. I placed some carrots in between layers of cabbage when I was transporting it to a stoneware container. Also I sprinkled few layers with ground caraway and just before the last layer I added apples and covered them with last layer of cabbage. 

You have to make sure all the juices go to the container. You must press the cabbage down again, quite firmly, then cover with clean cloth and place something heavy on the top to weight it down - I used plate with big jar of water. Cabbage must be weighed down, and eventually, submerged beneath its liquid.  If after 24 hours in room temperature, the liquid has not risen above the cabbage, dissolve 1 teaspoon of salt in 1 cup of water and add just enough to submerge the cabbage.

bashing the cabbage with a rolling pin

Ferment the cabbage for 3 to 14 days. Time will depend on the quantity you are making and the temperature. At the beginning keep it at the room temperature, but then after about 1-3 days place in a cool place, preferably about 12-15 C. As it's fermenting, keep the sauerkraut away from direct sunlight, check it daily and press it down if the cabbage appears above the liquid. After about 1-3 days (again depending on the quantity) get a wooden spoon and using it's bottom pierce the cabbage in few places to remove the natural gas that may occur during the fermentation and sometimes can make the cabbage taste a bit bitter.

Small batch of sauerkraut will ferment more quickly than larger one. Start tasting it after 3 days — when the sauerkraut tastes good to you, remove the weight, place cabbage in the jars, screw on the cap, and refrigerate (I keep in the cool garage during Autumn/Winter). You can also allow the sauerkraut to continue fermenting for 10 days or longer. There are no hard rules for when the sauerkraut is ready— go by how it looks and tastes.

Gas, bubbles, noises are all happy signs of fermentation so do not worry. :) And please note the released juices are extremely tasty, refreshing and healthy.

Refrigerated in jars sauerkraut should keep for 2-3 months. 


chopped cabbage in stoneware dish


I hope you have enjoyed my first English post in months and I would love to hear from you if you make your own sauerkraut. 

our traditional stoneware dish we brought from Poland

Monday, 3 December 2012

Apple & Old Peculier ale winter chutney - Christmas gifts vol. 8


Yes, it is this time of the year already. If you are keen on making your own Xmas gifts for foodies please fell free to see all my posts from my culinary gifts section, as there are some more chutneys (unfortunately seasonal) and different types of shortbread etc.

This year I made my first chutney using one of my favourite ales from local brewery. You can use different ale, preferably strong, dark and with fruity notes like the Old Peculier.

This is an ideal gift for cheese lovers, I can't wait to try it when it will be matured but even hot and straight from a pan it wasn't too vinegary in flavour.

Please have a piece of gauze and string ready - this is needed if you want to infuse the chutney with spices and remove them before putting in the jars - eating whole peppercorns could be rather unpleasant, so please prevent it if you can. 


makes 5 jars, each about 200ml 

1½ kg apples
3 medium white onions
100g  currants
50g sultanas
1 pint of Old Peculier Ale
1½ cup of dark, soft sugar
1 cup of cider vinegar
1 tsp of whole coriander seeds
½ tsp of whole black peppercorns
½ tsp of ground cinnamon 
half star anise
¼ tsp chilli flakes

Place sultanas and currants in a bowl and cover with ale. Leave it to soak for at least 1 hour.

Place coriander seeds, peppercorns in a mortar and crush them slightly. They don't want to be very fine. Place onto a piece of gauze and add chilli flakes, star anise and tie with a piece of string. Set aside.

Peel the core the apples and then dice into about 0.5 cm pieces. Place in a large pan, preferably heavy bottom one. 

Peel the onions and dice into small pieces. Add to the pan with the apples. 

To the pan add the sugar, ground cinnamon, vinegar, remaining ale and soaked currants and sultanas. Add the bag with spices and bring to the boil. Then lower the heat and simmer for about 2½ - 3 hours, stirring occasionally. 

Most of the liquid should evaporate and apples should be very soft. If you wish to have less chunkier chutney use potato masher and roughly mash the chutney after removing the spices in the bag. Or you can leave it as chunky - texture really depends on the variety of apples you are using. 

Place hot chutney in the sterilised jars, seal and turn up side down and leave them to cool down. You can pasteurise it of you wish to keep it for longer than 6 months. To do so place clean kitchen cloth in a pan together with the jars - up side down and cover half way with water. Bring to the boil and then simmer for about 30 minutes. Leave it to cool down, remove from a pan, dry and store in dark, cool place.

Thursday, 19 July 2012

Vegan sweet chilli sauce

I have confession to make.  I am absolutely crazy about certain sauce. I like it with chips, to dunk a tofu in, I hardly can imagine fishcakes without it, and just recently I baked crispy chicken strips and had them with this sauce. When I add it to basic hummus it gives it a new dimension, it can be served with thick Greek yogurt as a dip for vegetables. I use it with some stir fries, and recently I served it as a dip for mini tortillas with sorrel and it worked surprisingly well.

Is is sweet chilli sauce available in most supermarkets. However making you own takes about 20 minutes and you can be absolutely sure that there are no nonsense ingredients, such as glucose syrup or preservatives. I used it quite a lot so for me it is important to have something with possibly natural and fresh ingredients only.   Also it is quite handy to decide if you want less hot sauce by removing the seeds from the chillies. My version is vegan. Traditionally this sauce can contain nam pla (fish sauce), I use some lime. Also I use some starch to thicken this up, but the traditional sauce is being cooked until reduced and thick. 

This is one of my favourite condiments. Stay tuned as I will post a recipe for lovely burgers that go really well with sweet chilli sauce.


makes about 200ml 

3 cred chillies, one with seeds, two deseeded 
3 garlic cloves, peeled
juice of half lime
zest of whole lime
¼ cup of rice vinegar 
½ cup of sugar
¾ cup of water
½ tsp salt
1 tbsp cornflour dissolved in 2 tbsp water (optional)

Chop chillies, garlic very finely using knife or food processor. 

To a small pan add the sugar, water, lime juice and zest, vinegar and salt together with chopped chillies and garlic. Bring to the boil and lower the heat, then simmer for about 15 minutes until slightly reduced. Net add cornflour dissolved in water, stir, bring to the boil and immediately remove from the heat. Leave it to cool down.

Place in a jar, seal and keep refrigerated. Difficult to say for how long you can store this, with us it always disappears within 10 days or so. However you should be able to keep it for longer if you pasteurize it.

Wednesday, 16 May 2012

Thyme & lemon chicken supreme, rhubarb reduction and roasted asparagus

My partner mentioned recently that I did not have a plate full of this popular trio of meat/fish, potatoes/or other starch and veg for a long time on my blog. I have to say this is not something that we eat on everyday basis; however this seems to be very popular in many, many homes (both British and Polish!). 

Therefore when next opportunity came I took some photographs of our dinner of meat, potatoes and veg. It was very nice but I thing the pièce de résistance was the rhubarb reduction. 

I love this veg and I am very fortunate to live in Yorkshire known from its delicious rhubarb. There is even something called the Rhubarb Triangle is a 9-square-mile (23 km2) triangle in West Yorkshire, located between Wakefield, Morley and Rothwell famous for producing rhubarb. They use to produce 90% of the world's winter forced rhubarb! Isn’t this impressive? Wakefield is know for its Rhubarb Festival and this is something that I like Brits for – they know how to celebrate small things and don’t need a huge, important reason to party.

We also had Yorkshire asparagus and some British new potatoes. If only the weather was better, I would believe we have the spring in full bloom!


Rhubarb & balsamico reduction

about 150ml 

1 tsp sunflower oil
1 tsp butter
1 shallot, peeled and finely chopped  
walnut size piece of fresh ginger, peeled and grated
2 rhubarb stalks, chopped into 1cm pieces  
1 tbsp dark muscovado sugar  
2 tbsp balsamic vinegar (I used cheap supermarket vinegar)
salt
freshly ground black pepper

Place the oil and the butter in little pan and fry the shallot over a low heat until soft. Add ginger and fry for another minute. Next add the rhubarb, sugar, vinegar and bring it to boil. Stir until the sugar is dissolved and turn the heat down. Add some salt and pepper and simmer until it is reduced slightly, about 25 minutes. Be careful – it can catch at the bottom of the pan, so stir it regularly. It can also spit quite a lot. Next sieve it using very fine sieve and return to the pan. You can simmer this for little bit longer, so the flavour and colour will be more concentrated. Serve warm.

We had some leftover reduction with cheese (instead of chutney) next day and it went together really well.
  

Chicken supreme with lemon and thyme  

Serves 2 

2 chicken supreme breasts  
2 tbsp sunflower oil  
2 springs of fresh thyme, leaves picked
2 tsp lemon juice  
salt
freshly ground black pepper

Heat the oven to 180 C (fan) and line the baking tray with some kitchen foil. Gently lift the sin off the chicken flesh and rub some lemon juice in it followed by some salt and pepper and thyme leaves. Pres the skin back and season with some salt and pepper.

Place the oil into a frying pan and heat. When hot place the chicken breasts skin side down and fry for few minutes until crispy and browned and turn on the other side. Fry for further 3 minutes.

Place the pan fried chicken breasts onto baking tray and loosely cover with kitchen foil. Place in the oven and roast for about 20 minutes, uncover the foil to allow the skin to brown more. After removing from the oven leave the meat to rest for about 5-8 minutes. This is the moment when you should place your asparagus in the oven. 


Roast asparagus with olive and smoked salt 

Serves 2 

8-10 green asparagus spears, wooden parts removed
1 tbsp olive oil
smoked salt flakes

Line a baking tray with some kitchen foil. Place the asparagus onto the tray and cover the tips only with a piece of foil – they are too gentle for the fierce heat of oven. Drizzle with olive oil and wait until the chicken is ready to be taken out from the oven, or place the asparagus about 3-4 minutes before removing the chicken. It depends how long you want to leave the meat for resting. I think 5 minutes is fine, I cover it with piece of foil to prevent from getting cold and in my opinion asparagus doesn’t need more that 5-8 minutes in the oven.  

In the meantime boil the potatoes – however you like them. I boiled mine in skins and peeled just before the serving also I brushed them with some good quality EV olive oil.

Now! How to put everything together:

Slice the chicken into few slices and arrange on the plate. Add some rhubarb reduction (or smear it like some chefs do), potatoes and asparagus. Sprinkle with little smoked salt just to finish off. Serve immediately.

Wednesday, 28 March 2012

Homemade mayonnaises. Two. Well.. Four.


Shop bought mayonnaise has been getting worst for quite some time. It made me wonder why I don't make my own more often. It is easy to make and the only problem with it is that it has to be consumed within 5-7 days. I suppose it can be a down side of making my own every time I fancy some mayo, but on the other hand I don't buy ready cakes made with dried eggs so why should I compromise on the mayonnaise?

The secret of good mayonnaise are fresh eggs and using ingredients in a room temperature. You have to be also careful with adding the oil - just a drop by drop at the beginning and then little bit more, but still steady!

I remember when I was making my first mayonnaise using a hand balloon whisker. It was this moment when Mike Robinson, BBC chef walked into the kitchen. He was around shooting some program about game in British cuisine and came for a lunch to the pub and restaurant that I use to work in. He liked it so much, that he decided to come back for a dinner the same night. And here he was - standing in a front of my while I was mixing my first mayonnaise. He came to say hello to those who were cooking for him that night. I often wonder if I would die of a heart attack if it was one of Roux brothers (or their sons) walking into that kitchen. They are without a shadow of a doubt the masters of eggs. 

The basic recipe I am going to show you today come from "Eggs" by Roux and what I found very interesting there was also a recipe for a mayonnaise using whites instead of yolks. It is lower in fat but this is not what convinced me to make this version of mayonnaise but the fact that I wasn't leaving any white behind while making classic one. No leftovers - how nice, I thought and I made both. The one made with whites was not as stiff as the classic one, I would say it was fluffier. What a great base to make some flavoured variation! Here they are: two plain and my two flavoured mayonnaises.
 

Classic mayonnaise 

about 300ml 

2 egg yolks
1 tbsp of Dijon mustard
250ml sunflower oil (or other neutral such as grape seed oil)
2 tbsp white wine vinegar or lemon juice (or less/more up to your taste)
salt
freshly ground black pepper

Place egg yolks in a large bowl and add the mustard and some salt and pepper. Using electric hand or stand mixer or just a balloon whisk mix the yolks with the mustard until well mixed. Next add a drop of oil and mix all the time. Add next drop of oil only when the previous one is incorporated into the eggs. Whenthe mixture starts to thicken you may add little bit more oil at time, mixing all the time. When all oil in mixed into the eggs beat vigorously for about 30 seconds until the mayonnaise is shiny. Next add the lemon juice or vinegar and adjust the seasoning.

Refrigerate in a sealed jar and consume within 5-7 days.


Mayonnaise made with whites

about 300ml 

2 egg whites
1 tbsp of Dijon mustard
250ml sunflower oil (or other neutral such as grape seed oil)
2 tbsp white wine vinegar or lemon juice (or less/more up to your taste)
salt
freshly ground black pepper

Place egg whites in a large bowl and add the mustard and some salt and pepper. Using electric hand or stand mixer or just a balloon whisk mix the whites with the mustard until well mixed and starts to thicken little bit. Next add a drop of oil and mix all the time. Add next drop of oil only when the previous one is incorporated into the eggs. When the mixture starts to thicken you may add little bit more oil at time, mixing all the time. When all oil in mixed into the whites beat vigorously for about 30 seconds until the mayonnaise is shiny. Next add the lemon juice or vinegar and adjust the seasoning.

Refrigerate in a sealed jar and consume within 5-7 days.


Tarragon mayonnaise

about 150ml

half of the classic mayonnaise made with the recipe above
1 tbsp fresh tarragon, finely chopped

Mix the tarragon into the mayonnaise and store in a fridge in a jar.


Light mayonnaise with capers and dill

about 150ml

half of the mayonnaise made with whites (recipe above)
1 tsp salted capers, rinsed
2 tbsp fresh dill, finely chopped

Mix all the above and store in a fridge in a jar.

Both versions will go very well with eggs, meat and fish dishes. The one made with whites is almost like a light cold sauce. 


While I am writing about the eggs. I buy eggs marked 0 or 1 only. Have a look at the photograph below showing you what quality of life had hens. Let them enjoy life while we enjoy their eggs.

Monday, 25 July 2011

Spiced plum chutney


I trusted Hugh Fearnley-Whittingstall and his recipe published in The Guardian , but I forgot to buy the apples. I hope you can trust me and mine slightly changed recipe for spiced plum chutney. It tasted good when still hot, but I like quite sour, vinegar taste. It will fully develop it's flavour after 2-3 months maturing.

Due to the lack of apples that contain a lot of pectin, I used liquid pectin (Certo) and changed some quantities.   I am not sure which variety of plums I used, as there was not information on the market and I forgot to ask. I am going to make some more of this chutney later on this summer, with August ad September varieties, such as damsons or similar. 

Makes 6 jars, about 200ml each 

1.1 kg plums, quartered and stoned
300g onions, peeled and diced
180g stoned prunes, roughly chopped
fresh root ginger thumb size, peeled and finely chopped
400g soft dark brown sugar
400ml vinegar (I used some malt and some red wine vinegar)
2 tsp dried chilli flakes
salt
2 tsp mustard seeds
2 tsp black peppercorns, roughly crushed
about 70g of liquid pectin

Place all the above except the pectin in heave based pan. Bring to the boil and then simmer for about 2 hours, stirring occasionally, especially be careful with last 30 minutes, when chutney gets sticky and tends to burn. Then remove from the heat and stir in the pectin.

Place hot chutney in the sterilised jars, seal and turn up side down and leave them to cool down. You can pasteurise it of you wish to keep it for longer than 6-9 months. Our chutney will disappear before end of this year. Allow to mature for about 2-3 months.  

Saturday, 2 July 2011

Gooseberry chutney


I always show you recipes for dishes that I cooked myself and tasted so I can without shadow of a doubt recommend to you. Today it will be different, I am taking a bit of risk. I have made this chutney based on ingredients of Waitrose gooseberry chutney and various recipes I have found on-line, but I have improvised little bit.

I liked this chutney even when hot, even with this strong vinegar taste, which I am sure will disappear and develop into something else within a time. However I cannot be sure of the final outcome because it was the first time I have made gooseberry chutney. I did not want to wait until next year, so today here it is! Perhaps you will trust my senses and decide to make this or similar chutney this season. I hope it will be worth waiting, I cannot wait to have it with chunk o cheese.

Makes 2½ jars, 190ml each

400g gooseberry, topped and tailed
1 large onion, peeled and diced
handful of sultanas
150g soft brown sugar
180ml malt vinegar
tsp salt
½ tsp ground ginger
¼ tsp cayenne pepper
tsp mustard seeds

Place all of the above in heavy based pan and bring to boil. Turn the heat down and simmer for about 1.5 hrs. Occasionally stir, gently so you do not break up gooseberries too much. Keep an eye on it on last 15 minutes, stirring more often, so it prevents the chutney to catch and burn.

Place hot chutney in sterilised jars, seal and turn up side down. Leave it to cool down and store in cool, dark place. Allow to mature for about 2 months.

Tasting about September time. Keep you fingers crossed!

EDIT: It tastes great! I definitely will prepare more next year. 

Wednesday, 15 December 2010

Rosemary & mint salt - Christmas gifts vol. 5


I have gone crazy. I have made another flavoured salt. I simply could not resist especially when I smelled fresh rosemary the other day. Also because I knew there is some leftover fresh mint in my fridge, which I bought for a dinner (this pasta). Therefore next day I prepared another flavoured salt which in my opinion will go very well with lamb. I had the opportunity to taste it last weekend and it is perfect with roast potatoes. It smells lovely and look at this colour!


about 8 tbsp rock sea salt (or flaky)
about 2 tbsp fresh rosemary, leaves picked
about 2 tbsp fresh mint, leaves picked

Place all of the ingredients in the food processor and grind until herbs are finely grinded but salt still remains bit coarse. You can make a fine salt if you like.

It happens that I had oven reheated to 175C because I just finished to bake a cake, so I turned the oven off and placed salt sprinkled over a baking tray lined with paper inside. Shake it every 10 minutes , two or three times so the salt dries out evenly. Leave it to cool down in the oven. Then place in clean, sterilised jar.

It might be my last flavoured salt, but perhaps something will inspire me again... Who knows?

Thursday, 9 December 2010

Szechuan pepper, lemon, chilli & fennel salt - Christmas gifts vol. 3


My first Christmas gifts post turned out to be quite popular, so I decided to make another flavoured salt. I did not realise how easy is it and it is only your own imagination that limits you, and obviously the herbs and spices in your cupboard.

So if you liked my thyme and lemon salt I hope you will like this one, which perhaps is more interesting for people who like more intense flavours and aroma of spices rather than herbs. Also it makes nice set together with a previous salt. This one should go nicely with pork, fish and vegetable dishes. It has a bit of a kick.

I hope you will enjoy making your own salts. Certainly his is not my last one, but I am not sure if I will manage to show another one before Christmas, so use your imagination and create your own and have fun at the same time.


about 10 tbsp of rock sea salt (or flaky)
rind of one lemon (try to peel it quite thin, the white bit could e bitter)
1 whole dried chilli
2 tbsp Szechuan (or Sichuan) pepper
2 tbsp fennel seeds

Preheat the oven to about 100 C.

Cut the lemon peel into small squares and place onto a baking tray. Place in the oven, set the temperature to about 100 C and bake for about 15 minutes. Turn the oven off and leave the lemon rind closed in the oven until completely cold.

Roughly chop the lemon rind and all the spices in mini chopper or using pestle and mortar. Next add salt and grind - again roughly or finely. I decided to make fine salt so all the flavours mix together and the salt is ready to use.

Place in dry, clean ,airtight jars.

Monday, 6 December 2010

Cranberry & apple chutney - Christmas gifts vol. 2

Today another Christmas gift idea as the time is running like mad and there is less than three weeks left now! I have seen similar recipe in "Good Food" magazine, December 2010 issue, but I have made something similar in the past which I did not place in the jars but used immediately with some roast meat. Inspired by magazine I decided to place this chutney in a jars and leave it to matire for few weeks before Christmas.

Click here for lemon & thyme salt - another exciting Christmas gift idea.


Makes about 4 x 200ml jars

3 large, cooking apples
1 firm pear
1 large, white onion
350g fresh cranberries
piece of fresh ginger, walnut size
about 150g sugar
about 100ml cider of white wine vinegar
few whole black peppercorns

Peel and core the apples and pear, then dice it into small pieces. Peel the onion, cut in half and into slices. Peel and finely chop the ginger.

Place all ingredients except cranberries in a heavy-based pan, then gently heat, stirring, until the sugar dissolves. Bring to the boil, then reduce heat and simmer, uncovered, stirring regularly until the apples and onions are tender and there is no watery juice remains.

Then add the cranberries and stir gently. Keep on the heat for another 10 minutes until cranberries are softened but not all of them are burst.

Spoon the hot chutney into sterilised jars, seal and store in a cool dark place. It will keep up to 6 months. It taste the best after 2-3 weeks of maturing.

Thursday, 21 October 2010

Harissa


Few years back when I use to read about standards required in Michelin stars restaurants I was bit shocked. But then after few years I totally understand why all of those standards are so high. I use to think that chopping vegetables into equal pieces or spending time on making your own pastry is a bit of a waste of time and called it quite obsessive.

Professional Michelin inspectors anonymously visit restaurants evaluate them on a range of criteria. If they are impressed by a restaurant, they visit the establishment again. And again. Quite an obsessive research, isn’t it? This actually makes the Michelin stars restaurants such a reliable place to eat. No matter what the occasion, time of the year you will always find the best food in those places. Also, I believe that you will remember this meal for long…

It is not only the prestige of the place that comes with Michelin stars but also a big money – the restaurants can be fully booked months in advance.

Now after few years of cooking at home, learning new skills, tasting menus from different chefs I know exactly that those small things make a huge difference. These things are taking dishes to the new exciting level.

I know that sometimes it is difficult to find time to make your own puff pastry, pesto or real stock and we use some bought, ready – made. It is OK, but it certainly brings the taste down. No matter how expensive the stuff from the shops is, the homemade one is always better.

Call me snob, or obsessed but I prefer to make my own pesto, pastry or stock. This is what makes my guests think “WOW” when they try my dishes. Perhaps this is something that you cannot name, you are not sure what it is, but you can tell that it makes big difference to the taste. It is important for me, because I eat not only to satisfy a hunger…

Taking all the above into a consideration I stopped buying ready made harissa and made my own, that was much better than any from a jar that I tried before. This hot chilli sauce is commonly eaten in North Africa and Middle East. It is great with any meat dish, if you like hot dishes, excellent with veg too – especially with lentils or beans dishes.


From “Good Food”, September 2010 issue

Makes about 5 tablespoons


10 fresh red finger length chillies
1 ½tsp coriander seeds
½ tsp cumin seeds
½ tsp caraway seeds
3 garlic cloves, peeled and roughly chopped
½ sea salt, preferably flaked
2 tsp tomato puree
2½ tsp lemon juice
1 tbsp olive oil (mild, not extra virgin, as it will overpower the taste of other ingredients)
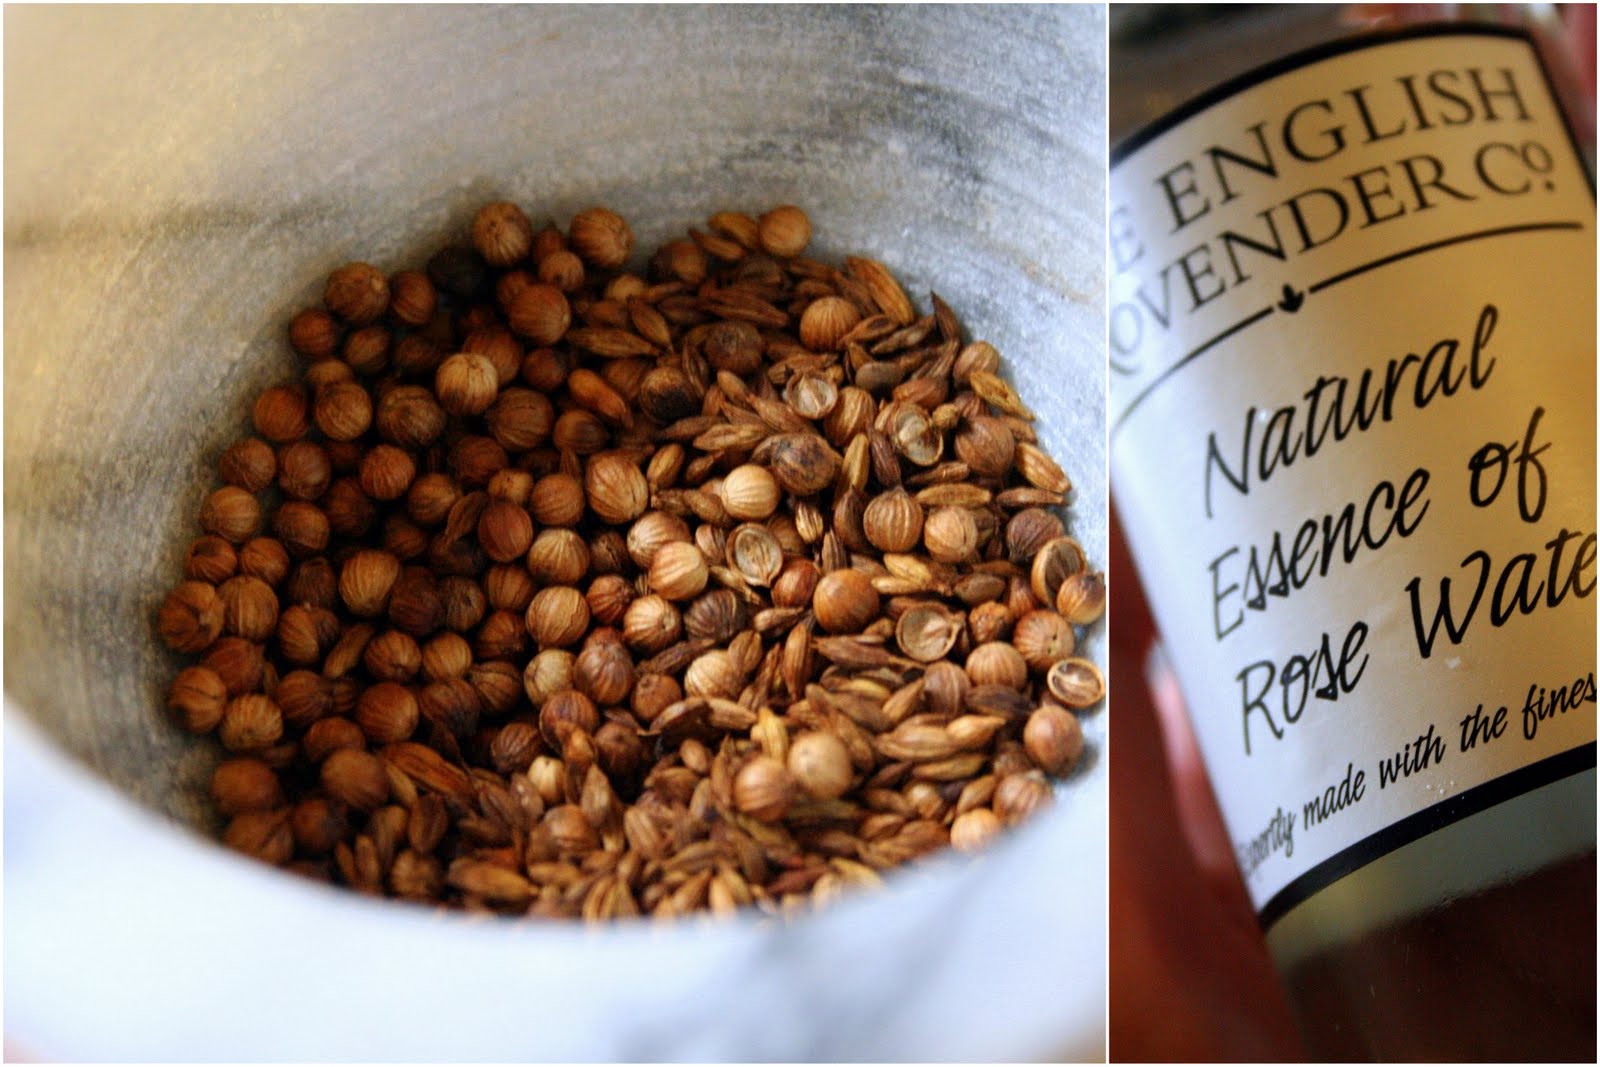
7 drops rose water (optional, but highly recommended!)

Place frying pan over a medium heat and char the chillies turning them now and then until fairly blackened and covered in “blisters”. Remove from a pan, place in a plastic bad, seal it and leave it to cool down slightly, for about 10 minutes.

In the same frying pan over a low heat gently toast the cumin, caraway and coriander seeds, for about 2 minutes, tossing them, until fragrant. Place in a mortar and smash with pestle.

Peel away the skins from chillies and deseed them. I recommend you use a latex gloves or wash your hands with oil and then with water and soap to avoid any nasty consequences (especially man – do not be tempted to do this job and go to the toilet without washing your hands carefully). Capsaicin from chillies is hydrophobic, so you cannot wash it away using water, but you can do so using alcohol or oils. This is why you should rub some oil into your hands before washing them with water and soap.

With a pestle and mortar pound the chillies, spices, garlic and salt together until as fine as possible. Stir in tomato puree, lemon juice and rose water and allow flavours to combine for at least one hour before using.

Unfortunately the magazine did not tell us how long we can keep this refrigerated. I am keeping mine for 2 weeks now and everything looks and tastes OK. I would think it will last long if covered with layer of oil. I would try to freeze it in ice container, to make small cubes – each for single use.

If harissa is to hot for you make it milder by adding more olive.

Monday, 20 September 2010

Review & I fight my demons vol. 2

Recently I mentioned I am going to test my new kitchen equipment that was kindly offered by CSN Stores. Also at the same time I fought my next culinary demon - homemade pasta.

Honestly, before I made my own pasta I thought it was extremely difficult, time consuming and the outcome would not be good enough to waste my time and money to buy a pasta maker. Also I was told it is not worth buying £20-30 makers, as they do not last long and are difficult to manage.

So when I had the opportunity to shop at CSN Stores my first thought was - pasta machine! I have decided to go for Imperia pasta maker, which costs around £50-60 and seems to be in the middle range of manual pasta makers. I have decided to buy this one, without any attachments to make short pasta or ravioli, because I did not know if making homemade pasta will be fun. Now I know t certainly is!

Right... Perhaps I will introduce you to the machine first. Imperia Double Cutter Pasta Machine came in the box and it was quite heavy, yet not to heavy to handle. It has detachable handle, tabletop screw clamp fitting and full care and use instructions.

The machine consists of two rollers that can be gradually adjusted (6 positions), rolling the pasta into thinner sheets as the handle is turned. Also it comes with tagliatelle and spaghetti attachment. Once the correct thickness has been achieved you can either cut you pasta sheets into your favourite shape or feed it through the cutter.

The rollers and the cutter run smoothly, the maker is solid and once secured to the top it can be one hand operated without sliding. The extra attachment to make short pasta is available and it is matter of time until I buy it, because I already love to make my own pasta. Also, I will use it to roll out the dough for lasagne sheets, handmade ravioli or Polish dumplings. I do not have the attachment to make ravioli, but these are so easy to achieve when you have a perfectly rolled dough. I just make them by hand and pastry cutter.

I am very happy with my new equipment and would recommend making your own pasta to everybody who loves simple Italian food. Homemade pasta does not need fancy ingredients - good quality olive oil, garlic, basil and parmesan are more than enough. Let pasta speak for itself.


Now, I tell you how to make your own pasta. I used recipe from fabulous book "Made in Italy. Food and the stories" by Giorgio Locatelli for fresh egg pasta using Italian "00" type flour. You can use one egg for every 100g of flour, however it is good to add some extra egg yolks. The more egg yolks you add the more brittle the pasta becomes.


Homemade tagliatelle


Makes about 600g

500g Italian "00" (doppio zero) flour
3 large eggs in room temperature
2 egg yolks (optional, you can use whole extra eggs)
pinch of salt

Preferably make pasta by hand, especially when you make small amount as it can be difficult to mix well by food processor.

Sieve the flour into a bowl, then turn into a mound onto a clean surface and make a well in the middle. Sprinkle the salt into a well and then crack in the eggs.

You can have a bowl of water on the side, so you can wet your hands to help bring the dough together if it getting too difficult towards the end of kneading.

To begin brake the egg yolks with your fingertips and then begin to move your fingers in a circular motion, gradually incorporating the flour until you have worked in enough to start bringing in together in a ball. The you start to work the ball of dough by pushing it with the heel of your hand, then folding the top back to itself, repeating again and again.

To make the dough you have to spend a good 10minutes on kneading, the dough should come together and feel quite stiff. However it is no good to overdo the dough. You need to leave it in damp cloth for about 1 hour to rest and it will become softer.

Next roll the pasta using a rolling pin first so it is not too thick when rolling in the machine, about 1 cm thick is enough. Put the machine of the thickest setting and start rolling. You have to support the rolled dough with you hand so it will not fold or stick. Change to next setting and roll again. Repeat another 2-3 times taking the setting down every time.


Next fold the pasta onto itself, put the machine into first setting and put the pasta through. Repeat 2-3 times, changing the setting to thinner. If you feel the dough is too sticky dust with very little flour. The final dough should be about 1.5mm thick, shiny and with no lines in it. You can use it to make long pasta using cutting attachment, or cut it by hand. Also you can cut it into lasagne dish or use t to make filled pasta such as tortellini or ravioli. You can dried it and keep in the paper bag, or in the jar or you can use it straight away.

Fresh egg pasta needs only about 3-4 minutes of cooking.


Also today I will show the recipe from the same book for a classic pesto that is delicious with homemade pasta. Homemade pesto is much better than a shop bought one, as the shop bought one can be too garlicky and has chemical smell and taste.


Classic pesto

Makes small jar

2 garlic cloves
2 tbsp of pine nuts, slightly toasted
250g basil leaves
2 tbsp pecorino or parmesan cheese, grated
around 300ml extra virgin olive oil
tiny pinch of salt

Either in the food processor with a sharp blade or using pestle and mortar start with the garlic and salt. Smash the garlic, then add the nuts and crush them, but try not to overwork them. Drop in the basil leaves a few at time and work them in as quickly as possible. Then add you cheese and oil until you have bright, green paste. The quicker you bring it together the brighter the colour will be as you will not generate too much heat.

Place in the jar, cover with layer of oil keep refrigerated. It will keep for 6 months, especially if you used young basil that did not start to flower.

See also:
I fight my demons, vol. 1

Monday, 13 September 2010

Cauliflower & gorgonzola soup with pear relish


I mentioned few days ago that I had a soup crisis and did not eat the soups for weeks until I have finally found inspiring recipes. There was a recipe that really impressed me and I wanted to make this soup as soon as possible. It is a recipe for a cauliflower soup that I have found in Good Food, October 2010 issue (I have made few alterations). Very unusual, very good for Autumn, very comforting and pear relish takes it to a very exciting new level. I hope it will interest you too and you are going to make it. It is definitely worth it.


Soup


Serves 4


1 medium cauliflower
2 tbsp unsalted butter
2 small yellow onions, peeled and diced
few thyme springs
bay leaf
1 l vegetable stock
200g gorgonzola
2 tbsp crème fraîche
salt
freshly ground black pepper

Remove the outer leaves from cauliflower and cut into florets, saving the stalk and chopping it into pieces.

Melt the butter in a pan add the onions and fry until translucent and soft. Add cauliflower, thyme, bay leaf, stock, little salt and pepper. Cover and simmer until the cauliflower is soft.

Remove bay leaf, crumble in gorgonzola, add and stir to combine. When the cheese is melted whizz the sup until perfectly smooth. Reheat gently.


Pear relish


2 tbsp dried cranberries
1 tbsp currants
2 firm pears
1 firm apple
75ml cider or red wine vinegar
2 tbsp caster sugar
tbsp picked thyme leaves
half tsp ground cinnamon

Soak cranberries and currants in little warm water for about 10 minutes and drain.

Core and dice pears and apples, leave them unpeeled.

Melt the butter in a small pan over a low heat, add the diced fruit and cook for 5 minutes. Next add all the remaining ingredients and cook for about 10 minutes. The relish should be shiny and slightly translucent. It did not work with mine and I was afraid of overcooking the pears and apples so I drained them. I added 2 tbsp caster sugar to the pan and left it until it turned to caramel. Next I added the drained fruit and left it to caramelised a bit.

You can keep the relish in a covered bowl in the fridge for a week.

Serve a soup with a little warm relish in the centre, sprinkled with some pepper and fresh thyme.

Food heaven.

Tuesday, 17 August 2010

Caramelised red onion


All my life I was a proper city girl. Never had any family or friends living in the countryside so I have never made a physical contact with some animals, in particular farm ones.

I have made my first physical contact with goats one day when… working with my company. When I first started I was a part-timer doing small jobs – printing postage, paying in, and once I was asked to go and take the picture of the barn for conversion that we had for sale.

So I went into a middle of the field, trying not to cave in too much in my high heels (did not have wellies in the car that day and the ground was quite soft) and I was trying to take the best shot possible. Suddenly I realised one of the goats was chewing my trousers and the other was trying to scar me by stamping aggressively.

I was trying to scar the one that enjoyed my trousers but she seemed to have more fun. I was chased by both until I got into the car and came back to the office in my trousers with goats’ saliva on.

So I do not trust goats anymore but I love goats’ cheese. And there is something really tasty that goes very well with goats’ cheese and other cheese. It is homemade caramelised onion. It is tastier when matured for 4-6 weeks so do not be tempted to open the jar earlier as you may be disappointed.

I am not quite sure how many 190ml jar I had from the ingredients below, but at least 5. I am just about to finish the last one and will have to make some more – I will double the quantities this time.

Recipe is a pure improvisation.


1kg red onion
approx. 50g butter (I used ghee)
approx. 150ml red wine vinegar
approx. 100ml dry red wine
approx. 300g dark muscovado
to handfuls of dried cranberries
half tsp chilli powder
pinch of salt

Peel, half and slice the onions and add to the heavy bottom pan with melted butter. Fry over a low heat for about 15 minutes – it should be soft but not browned.

Next add the sugar, stir gently and fry for about 10 minutes. Next add the remaining ingredients and stir. Simmer over a low heat for about 15 minutes. Most of the liquids should evaporate, so you can turn the heat up for last few minutes, but be careful and do not burn the whole thing.

Also you can add some herbs such as thyme, but I prefer plain onion and adding some fresh herbs just before serving.

Place hot onions in sterilised jars, close and place up side down a big pan lined with kitchen towel. Fill with the hot water till about half of the jars height and boil (not rapidly) for about 10 minutes. Remove from the pan, set aside to cool down and store in a dark, cool place.

I think these should keep at least 1 year, but in my house do not last more than 3 months. I also use it for sausage or beef sandwiches.

Saturday, 17 July 2010

Tagliatelle with sun dried tomatoes pesto


I am back on-line! A week break from blogging actually made me realise how I like it. But lets get to the point, perhaps some of you are curious what is going on in my kitchen...

We both love quick pasta dishes, especially with various pestos. On Friday night, after work we do not need to spend lots of time in the kitchen cooking, we only need something quick, easy to make, tasty and comforting. Something that will accompaniment our usual Friday night bottle of wine. This is why we often choose pasta with various pestos.

This one is one of my favourite one and I like it as much as spinach and walnut pesto .


Serves 2

250g tagliatelle (or your favourite pasta)
145g sun dried tomatoes (drained 280g jar)
tbs of oil/olive oil from tomatoes
2-3 tbsp pine nuts
2-3 freshly grated parmesan
2 small garlic cloves
2 tbs dry red wine (I used cabernet sauvignon)
tbsp fresh oregano (sometimes I use different herbs such as fresh basil, marjoram or parsley)
freshly ground black pepper
salt

Put a big pan with some water on the hob and bring to boil, meantime prepare the pesto.

In a pan dry roast pine nuts, place 2 tbsp of them in a food processor and save the remaining for later. Add tomatoes, oil, garlic, oregano, wine, pepper and 2 tbsp of parmesan into the food processor and mix until smooth.

Boil the pasta al dente and drain saving about 2 espresso cups of water from the pasta. Add the water to the pesto and mix until smooth. Mix the drained pasta with the pesto, arrange in the pasta bowl, sprinkle with some pine nuts, parmesan and garnish with some fresh herbs. Serve immediately.

Monday, 5 July 2010

I fight my demons, vol. 1

I have my kitchen demons that I fight for years such as making typical Polish complicated birthday torts with many layers. Also, I made myself think that making my own choux pastry is too difficult and to make homemade puff pastry I should take al least three days off work and possibly I will ruin it anyway. All of those exist in my head and I can get over fear of making them.

Few months ago I was given a great recipe for homemade stock made from veal bones but I could not make it due to the lack of the main ingredient. Also, I thought it is too fussy, too complicated and time consuming. Possibly I was looking for an excuse.

Again, I saw similar recipe few weeks ago - with beef bones this time. Finally I decided to go to the local butchers and ask about bones. This is how I end up with huge bag of marrow bones in my car boot on Friday night (thank you very much Kevin & Gary!). There was no going back, as my freezer is full - I had to make the stock.

I show you to how to make a real beef stock, which is a beautiful ingredient for French onion soup, and can be reduced by 2/3 to demi-glace - a base for many sauces, that converts into a jelly when chilled down. I could not wait to taste it so I added some of this stock to our beef goulash on Saturday and my partner immediately tasted the difference. You may thinks that you do not have a time to make your own - please slow down the everyday race, perhaps from busy work to supermarket where you buy ready made stock, relax and for a few moments look at bones in huge stock pot - it is worth it.


Real beef stock


Makes approx. 2 litres


4 meaty beef bones with lots of marrow, preferably the knuckle bones, cut to expose the marrow
2 onions, unpeeled, halved
whole bulb of garlic, unpeeled, divided into cloves
3 carrots, unpeeled, cut into inch chunks
leek, cut into 4-5 pieces
3-4 celery sticks, cut into pieces
250ml dry white wine
about 250ml tinned tomatoes, skinless, chopped
handful of fresh herbs - I used thyme, parsley and 2 lovage leaves
3 bay leaves
tsp whole black peppercorns

Heat the oven to 250C. Place the bones into a roasting pan and roast in the oven for about 45 minutes. Next add onions, garlic, carrots, leek and celery and roast for further 20 minutes. The bones should be browned but not burned so turn the heat down if they begin to char.

Remove from the oven and place the meat and vegetables in big stock pot together with herbs, bay leaves, peppercorns and tomatoes.

Remove the fat from the roasting pan and add the wine to the pan and use the spatula to scrap up all of the browned bits stuck to the bottom of the pan. Next add to the stock pot. Add enough water to cover the meat. Bring to the boil, reduce the heat to the lowest level and simmer uncovered for about 4 hours. Do not stir.


Remove from the heat and sieve using a couple of layers of cheesecloth, to make sure all the solids are strained . Place the pan with the stock in iced cold water to cool down - the fat will risen on the top and solidified. Remove all the fat from the top using few tablespoons chilled in a freezer. Discard the fat; if you want you can use it to make savoury pies pastry.


Cool down completely, divide into a portions and place in a freezer.