Showing posts with label páté and dips. Show all posts

Tuesday, 4 December 2012

Roast aubergine & walnut pâté (no garlic!)


I love, love, love aubergine dips and pâtés. Unfortunately all of the recipes I have been through contain garlic and as much as I love garlic I am unable to eat it during the day - I don't want to stink in the office - as simple as that. So this is my take on aubergine pâté without the garlic but still very aromatic and rich. Hope these who don't like garlic or like me can't eat it all day long will find this recipe interesting.   

 makes about 250ml

2 medium - smallish aubergines, halved and sliced into 1cm slices
1 shallot, peeled, halved and sliced
handful of walnuts
handful of fresh parsley
juice of whole lime
1 tsp of tahini paste (I used dark one)
pinch of chilli powder
¼ tsp of turmeric
½ tsp of ground cumin
½ tsp of ground coriander
extra virgin olive oil
salt
freshly ground black pepper

Heat the oven to 180 C.

Place sliced aubergines in a bowl and drizzle with little olive oil, add some salt and pepper. Mix well so the vegetables are covered in oil. Place onto a baking tray or in ovenproof dish and then place in the oven. Roast for about 25 minutes, then turn the oven off, open it's door slightly and leave the aubergines to cool down.

Heat the frying pan without any oil and dry roast the walnuts until slightly browned and fragrant. Place in a food processor.

Using the same pan fry the shallots in little olive oil over a low heat until soft, then place in a food processor. 

Now to the food processor add aubergines, shallots, turmeric, parsley, tahini, chilli, coriander, cumin, lime juice and some salt and pepper. Mix and at the same time add little by little olive oil. I like it bit chunky with some aubergine skins still visible and also with pieces of walnuts, but you can make it extra smooth - just mix little but longer and using a spatula scrap down the dip from the food processor as you go.


Season with salt and pepper accordingly to you taste, place in airtight container and place in the fridge, preferably leave it there overnight, or at least couple of hours. This will allow the flavours to mingle.

Serve in room temperature, garnished with some chopped parsley.

Monday, 23 July 2012

Tuna & chickpea burgers + Thai inspired salad dressing


Perhaps you have made your homemade sweet chilli sauce and fancy something that will go well with it. Recently I had it with some chickpea and tuna burgers. I have made them based upon what we had in a fridge, freezer and cupboards. I wanted to cook a dinner that firstly will not require additional shopping and secondly will comfort mine appetite, that recently is so not into meat and also will not live my dear meat eater hungry. So this is improvisation and have to say it was very successful.

makes about 12 

about  200g dry chickpea
2 x 175g tins of tuna (in oil)
1 small onion, peeled and diced
2 garlic cloves, peeled and chopped
1 small red chilli, chopped
handful of fresh coriander (I used frozen, as I have some in the freezer)
2 small eggs, beaten
2 level tbsp of ground cumin
juice of half lemon
salt
freshly ground black pepper
some gram flour
oil for frying (I used sunflower)
lime wedges for serving (optional)

Soak the chickpea in a water overnight, then drain, cover with fresh water, add some salt and cook over a low heat until tender. Then drain and let it cool down.

Fry the onion in little oil over a low heat - it should be softened but not browned. Just before you finish frying the onion add the chilli and garlic and fry for about 1 minute. Remove from a heat and leave it to cool down.

Place the chickpea on a food processor and whiz until coarse in consistency - it should not be smooth, but it still should keep some of its texture. Place in a bowl.

Flake a tuna using a fork and place in the bowl. I did not drain mine, as it was in very little oil. Then add the fried onion, chilli, garlic, coriander, eggs, lemon juice, cumin, salt and pepper. Mix thoroughly with your hands.

Next wet your hands and form small burgers, then dip them in a gram flour and place onto a chopping board.

Heat a decent amount of oil in a frying pan _ you don't want to deep fry the burgers, but they should be dipped in a fat about half way. Fry on both sides until golden, remove from a pan and sit aside on a paper kitchen roll to drain the excess of oil.

I served these burgers with roast potato wadges, lime wedges, sweet chilli sauce and some iceberg salad with Thai inspired dressing.


Thai inspired salad dressing 

2 tbsp groundnut oil
1 tsp honey
1 tsp fish sauce (nam pla)
juice of half lime
pinch of chilli powder

Place all of the ingredients in a jar, seal and shake until mixed. Wash and chop the salad, place in a bowl, add dressing just before serving, mix well and divide between plates. Sprinkle with some dry roasted cumin seeds.

Bon appetite!

Thursday, 19 July 2012

Vegan sweet chilli sauce

I have confession to make.  I am absolutely crazy about certain sauce. I like it with chips, to dunk a tofu in, I hardly can imagine fishcakes without it, and just recently I baked crispy chicken strips and had them with this sauce. When I add it to basic hummus it gives it a new dimension, it can be served with thick Greek yogurt as a dip for vegetables. I use it with some stir fries, and recently I served it as a dip for mini tortillas with sorrel and it worked surprisingly well.

Is is sweet chilli sauce available in most supermarkets. However making you own takes about 20 minutes and you can be absolutely sure that there are no nonsense ingredients, such as glucose syrup or preservatives. I used it quite a lot so for me it is important to have something with possibly natural and fresh ingredients only.   Also it is quite handy to decide if you want less hot sauce by removing the seeds from the chillies. My version is vegan. Traditionally this sauce can contain nam pla (fish sauce), I use some lime. Also I use some starch to thicken this up, but the traditional sauce is being cooked until reduced and thick. 

This is one of my favourite condiments. Stay tuned as I will post a recipe for lovely burgers that go really well with sweet chilli sauce.


makes about 200ml 

3 cred chillies, one with seeds, two deseeded 
3 garlic cloves, peeled
juice of half lime
zest of whole lime
¼ cup of rice vinegar 
½ cup of sugar
¾ cup of water
½ tsp salt
1 tbsp cornflour dissolved in 2 tbsp water (optional)

Chop chillies, garlic very finely using knife or food processor. 

To a small pan add the sugar, water, lime juice and zest, vinegar and salt together with chopped chillies and garlic. Bring to the boil and lower the heat, then simmer for about 15 minutes until slightly reduced. Net add cornflour dissolved in water, stir, bring to the boil and immediately remove from the heat. Leave it to cool down.

Place in a jar, seal and keep refrigerated. Difficult to say for how long you can store this, with us it always disappears within 10 days or so. However you should be able to keep it for longer if you pasteurize it.

Wednesday, 4 April 2012

Smoked salmon parcels with caper cream cheese


This is my last post before Easter and my trip to Poland. I have some time off, so there will be a short break on my blog. Please do not forget about me, because like Terminator "I'll be back" and it will be fab time to go back to cooking and blogging - asparagus in season. Shall I say "I'll be back with a bunch of asparagus"?

Before I go I would like to show you something that looks nice and I think this is very interesting way of presenting cream cheese. I found the idea of wrapping cream cheese in smoked salmon in some ancient "Dales Life" magazine (recipe by Merry Berry) and originally the cooked and chopped prawns were used for a fillingalong with cheese. Since I tried the original one I went through several variations and all of them seemed fine i.e. chopped smoked salmon, gherkins, various herbs and today I will show you one with capers.

This is very rich dish so do not be tempted to serve one to one person only. In my opinion one parcel served with some crusty bread or toast or even good quality crackers or oat cakes should serve up to 3 people as a snack or starter. I cut each in six and let guest help themselves.

I wish you happy Easter and talk to you when I get back! 


Makes 2
 
4 large slices of smoked salmon 
about 150g cream cheese
1 tbsp salted capers, rinsed and chopped 
2 tbsp of fresh dill, chopped
zest of one lemon
1 tsp of lemon juice 
salt (optional, capers are salty)
freshly ground black pepper
some salad leaves and lemon wedges to serve 
springs of fresh dill to garnish (optional)


Mix the cream cheese with lemon zest and juice, capers, dill and freshly ground black pepper.

Line two soufflé dishes with some cling film making sure it is overlapping the dishes. Next line the dishes with smoked salmon slices in the same way - some of the fish should overlap each dish. Next add the cheese to the dishes and gently press with a spatula or spoon. Cover with the overlapping smoked salmonand then with the cling film and place in the fridge. Ideally overnight, but 2 hours will do. I also try to press them with some weight while they are resting.

Remove from the fridge, unwrap the foil and gently place upside down onto a serving plate. Garnish with some salad leaves, lemon wedges and serve.

Thursday, 15 March 2012

Mushroom & walnut pâté

  
Do you think about Easter already? I do. It does have quite strong religious character in Poland and I am not bothered about this, but I always manage to get some time off and this year I will spend this time with my family and friends in Poland. Therefore I look forward Easter and I cannot wait to get on a plane and go back home for few days. 

Today I would like to show you one of the recipes that can be quite useful when you have friends around and want to make light brunch, or just have something to snack. I find many people not knowing what tasty food to prepare when they have vegans or vegetarians for a meal. This is one of these things that will wow anybody, even committed meat eaters.  

I wonder how should I name it, but really a pâté seems to be suitable one (rather than dip).  The recipe below inspired by one from "Veganomicon. The Ultimate Vegan Cookbook" (Isa Chandra Moscowitz, Terry Hope Romero).

Makes about 2 cups 

about 5 tbsp olive oil
1 large onion, peeled and diced
3 garlic cloves, peeled and chopped  
leaves picked from 2-3 springs of fresh thyme
1 tsp of chopped fresh parsley  
about 400g mushrooms, roughly chopped (I used brown)
1 cup walnuts, lightly toasted in a dry pan
1 cup of cooked beans (I used cannellini)
2 tsp balsamic vinegar  
salt
freshly ground black pepper


Heat a frying pan over a medium heat and add the onion. Fry for about 10 minutes until soft, but not browned. Add the garlic, thyme, parsley and fry for about 3 minutes. Next add the mushrooms, season with salt and let them cook until softened. Remove from a heat and set aside. Let them cool down slightly. 

Place the walnuts in a food processor and process until very fine. 

Next add the beans and the mushrooms with all the juices from the pan. Add vinegar, quite a lot of pepper and whiz. Add the remaining 3 tbsp of olive oil while whizzing. 

Season with some salt and pepper if required and place the pate in an airtight container. Chill before serving. It tastes so much better next day, when the flavours have chance to mellow.   


Tuesday, 6 December 2011

Chicken liver parfaits & best brioche ever

This is one of my favourite things - creamy, almost velvety chicken liver parfait made with a cheap ingredient but almost luxurious. This makes quite elegant (tasty for sure) starter or light lunch, and I definitely recommend a slice or two of brioche to go with this. It has ridiculous amount of butter, almost enough to make you teeth slide on this, but without any doubt this is the best brioche I have made. This recipe by Michel Roux was recommended to my by a friend of mine and after making this brioche I will never look back. I have added some semolina, that did not appear in the original recipe, just to line my tin with something - it is not the best quality equipment so I was little bit concerned that the brioche will not come out easily. The parfaits go well with some cocktail gherkins too.  


Chicken liver parfaits 

Serves 6-10

450g chicken livers, trimmed  
150g butter, plus 50g for the top of the parfaits
1 garlic clove, peeled and crushed
1 shallot, peeled and chopped
leaves picked from 2-3 springs of fresh thyme
splash of brandy
2 tbsp double cream ( I used extra thick, 50.5% of fat)
pinch of freshly grated nutmeg
pinch of ground cloves
salt
freshly grated black pepper

Heat about 30g of the butter in a large frying pan and gently fry the shallots until soft. Add garlic, thyme leaves (save about tsp for topping the parfait) fry for about one minute or so and turn the heat up.

Add the trimmed livers to the pan with the garlic, shallot and thyme and fry on both sides for about 5 minutes. There should not be any blood coming out. Add the nutmeg, cloves and a splash of brandy. Keep on the heat until the brandy evaporates little bit. Remove from the heat and set aside. Let them cool down little bit.

Next tip the livers into a food processor and whizz to a paste, then whizz in the remaining butter and cream. Push the mixture through a sieve - this is boring, but takes about 2 minutes and it is certainly worth for a really velvety texture. Season well with salt and pepper. Divide the mixture between 6 small ramekins and smooth the surface.

Melt the final 50g butter in a pan and let the milk solids settle to the bottom. Place the remaining thyme leaves in the pan and let it infuse for few minutes. Next making sure you skip the milk solids pour a little butter over each ramekin. Chill to set.

To serve, bring the parfaits up to room temperature and you have to serve it with toasted slice of best brioche ever.

Best Brioche EVER 

makes small bread tin

35 ml lukewarm milk
7.5 g fresh yeast  (or 3.5g dry active or 4g instant)
250g all purpose flour
half tsp salt
3 eggs
175g soft butter
1 tbsp caster sugar

some more butter, for a tin
some semolina
beaten egg, optionally

Place the yeast and the milk in a mixing bowl and leave them for few minutes. Next mix them with the flour , salt and eggs until you have quite firm, elastic dough.

Meanwhile using a hand mixer beat the sugar with the butter and next add spoon by spoon of this buttery cream to the dough and mix all the time on a low speed. When last spoon of butter dis incorporated  mix for a little while on the higher speed, then cover the dough with a clean cloth and leave it to prove. It will take about 2-4 hours in a room temperature however I left it in the cold kitchen overnight. After first proving remove some air bubbles but do not be tempted to do this with a punch like with most breads - this dough is too sticky. Use spatula to remove some air. At this stage the dough can be moulded to the shape you like (individual brioches or one brioche in a tin).

Prepare the tin - butter is and sprinkle with little semolina, then shake the excess of semolina.  Place the dough in the tin and cover with a cling film. Leave it to prove again - I left mine in a fridge for whole day and removed from a fridge for about one hour before baking. It can be kept in a fridge up to 24 hours.

Heat the oven to 180C (fan). Brush with some beaten egg for a shiny finish. At this stage you can make a cut in the brioche to prevent the cracking, I was afraid that it will collapse when I do so, so I skipped cutting and my brioche did not crack too much. Bake until golden and the wooden toothpick comes out of it clean.

Remove from the oven, leave in the tin for few minutes and then remove it from a tin to a wire rack and leave it to cool down completely before slicing. Toast before serving but be careful - due to a high content of butter it burns easily, so watch the toaster.

Saturday, 28 May 2011

Courgette & feta bake


I found this recipe one of Polish culinary forums and it was named as a Bulgarian recipe. It is extremely tasty and for lat years I have been baking this every courgette season. Easy to make, the only thing you have to remember about is using fresh herbs. The choice is yours, I made it with dill, mint, basil, parsley and chives, and combinations of any of the above.It suppose taste great when made from grated marrow too.

Tastes great cold or hot, suitable for microwave reheating. For lunch, for snack, even for picnic. Enjoy!

Serves 2-4

4-5 courgettes (zucchini), not too big, cucumber size, coarsely grated, skin on
200g feta cheese, crumbled
2-3 eggs
handful of chopped fresh herbs - this time I used mint and chives
garlic clove, peeled and finely chopped
salt
freshly ground black pepper
about 5 tbsp of semolina
little olive oil

Add some salt to the grated courgettes and leave on a sieve for about 30 minutes, to remove the excess of water. Squeeze every 10 minutes to make sure the veg is quite dry.

Place in a big bowl, mix with all of the ingredients except the oil; use it to oil an ovenproof dish.

Place the courgettes in the oiled ovenproof dish, big enough to keep the bake 3cm height. Bake in the oven preheated to 180 C (fan) for about 40 minutes. Cool down before serving for 5-10 minutes, it will be  much easier to slice.

I like it with Greek tzatziki, but this time I made dill yoghurt dip


175g natural Greek yoghurt (I used Total)
handful of fresh chopped dill
1 large garlic clove, peeled and mashed with some salt
little olive oil (optionally)
freshly ground black pepper

Mix all of the above and chill in a fridge for about 30 minutes before serving.

Wednesday, 20 April 2011

Celeriac & walnut terrine

I am just about to fly to Poland. I am taking nearly two weeks break. Need to charge up my batteries, see my family and friends. To say good bye I prepared another thing that can end up on your Easter table and this time it is vegetarian. Again I would serve it with roasted beets & horseradish relish or just horseradish sauce (preferably homemade, freshly grated horseradish is wicked!)


I hope that you will have nice bank holiday
and enjoy the royal wedding!


All the best and see you when I get back!


makes small bread loaf tin

celeriac, peeled, weight after peeling about 650g, coarsely grated
large onion, peeled and finely chopped
2 garlic cloves, peeled and finely chopped
3 tbsp olive oil
about 200ml vegetable stock
2 whole eggs
3-4 tbsp of breadcrumbs
1/4 tsp grated nutmeg
1/4 chilli powder
salt
freshly grated black pepper
100g walnut pieces
few tbsp oat bran, to line the tin

In large pan fry the onion and garlic in olive oil for a little while. Add grated celeriac, fry for another minute and then add the stock. Cover and simmer for about 40 minutes. For the last 10 minutes uncover so the excess of liquid evaporates.

When the celeriac is soft, take off the heat and leave it to cool down.

Heat the oven to 200C (fan) and prepare the tin. Oil it with little olive oil and lie with some oat bran, shaking out its excess.

Add egg yolks to the celeriac when cooled down, nutmeg, chilli, most of the roughly chopped walnuts and breadcrumbs. (to be quite honest - I forgot about the breadcrumbs, so my terrine was a bit crumbly)

Whisk the egg whites with pinch of salt until quite stiff, then mix it gently with celeriac and other ingredients. Place it in the tin, cover with piece of tin foil and place in bigger dish filled with hot water (about 1/2 of the size of the loaf tin). This is called bain-marie, which is a type of preparation used for protecting dishes requiring gentle heat from the fierce heat of the oven.

Bake for about 40 minutes, then uncover and bake for further 10 minutes.

Remove from the oven and refrigerate (preferably overnight) in the fridge.


Tuesday, 12 April 2011

Lamb & apricots páté


I have just found out that today is… Chocolate Day. I haven’t got anything chocolate, but I have something that you may find handy for upcoming bank holidays. I will try to remember next year about the chocolate!

About year ago I made my first baked pate – chichen, orange and caramelised shallots páté. Now I know exactly how to make this kind of páté and I experiment with different types of meat and other ingredients. So far the best one I have made was lamb and apricot páté, made in very similar way as the previous one. It is not a rocket science and the taste is great. What probably more important I know exactly what is in it. Not like with those shop bought… (did you ever read the label?)

I encourage you to make your own, I know it can be time consuming, but the results are worth it. It goes really well with cranberry sauce (please, please, please - do not eat it only at the Christmas table, it so tasty it should be eaten more often), roasted beets & horseradish relish, or caramelised red onion. Next time I will try to make nice jelly topping.


1.8kg lamb shoulder (about 1.1kg when roast and boned)
2-3 tbsp olive oil
2 small carrots, cut into chunks
5-6 whole black peppercorns
1 bay leaf
2-3 allspice
2-3 garlic gloves, unpeeled
few springs of fresh thyme (I used lemon thyme)
few springs of fresh mint
big handful of dried apricots
about 175ml dry white wine
300g pork or chicken livers
about 30g butter
300g pancetta, diced (or smoked bacon lardons)
2 shallots, peeled and chopped
small stale bread roll
50ml brandy
salt
freshly ground black pepper
3 whole eggs
10-12 rashes of smoked streaky bacon or pancetta
cup of vegetable or chicken stock (optionally)

Heat the oven to 150 C.

Rub some salt, pepper into a lamb shoulder and fry on each side in olive oil until lightly browned. Place in an ovenproof casserole and add the oil remaining in the frying pan. Add carrots, garlic, mint, thyme, apricots, wine, whole peppercorns, allspice and bay leaf. Cover and roast for about 2.5 hours.

Fry the liver in the half of butter in the pan until browned, then remove from a pan and place in a bowl.

Using the same pan fry pancetta cubes without any extra fat until slightly browned. Remove from the pan and place in the bowl together with liver.

Still using the same pan fry the shallots in the remaining butter over very low heat, until golden, not browned. Add to the bowl with rest of ingredients.
Soak bread roll in some water, remove any excess of liquid and place in the bowl.

When lamb is cooked, remove from the oven, let it cool down, bone and add the meat to the bowl. Discard mint, garlic, allspice, bay leaf, but keep all the juices, thyme, apricots, carrots. Roughly pick some leaves from thyme and discard the tough bits.

Mince all the above ingredients three times using meat mincer, season with salt, pepper, add brandy, egg yolks and mix thoroughly with your hands. If the meat seems a bit dry add some liquid from roasting a lamb, alternatively you can add some extra stock. You should be able to mix this gently with stiff egg whites.

Whisk the egg whites with pinch of salt until they stiff and fold gently into the meat mixture.

Line big loaf tin (or use 3 small disposable tins) with bacon or pancetta slices, so they slightly overhanging the tin, fill it with a meat mixture, level with a spatula and cover with the overhanging bacon.

Cover the tin with a kitchen tin foil, place in bigger dish filled with hot water (about ¾ of the size of the loaf tin). This is called bain-marie, which is a type of preparation used for protecting dishes requiring gentle heat from the fierce heat of the oven.

Bake for 1 hour in preheated oven (180C), uncover and bake for further 10 minutes until the top is golden. Remove from the oven, let it cool down and leave in the fridge overnight before serving.

Saturday, 26 March 2011

Smoked rainbow trout, peas & mint puree


This is not a dip but you can make it more smooth. My initial intention was to make it quite smooth, but after few pulses of food processor I decided I prefer it as a rough puree. However next time I will try to make it smooth and serve on oatcakes or on rye bread as canapés.

Some time ago I really fancied a smoked fish and when I found lovely smoked rainbow trout on my local market I thought I will make pate in the same way I have made this smoked mackerel one. However I had a light bulb moment and decided to make it differently.

I was trying to find some fish combinations in my memory and I remembered this baked rainbow trout with mint and almonds. When I thought about a mint naturally peas came to my mind - this is one of my favourite snacks and flavour combinations. I started to have a rough idea of this puree, even if I thought it is going to b smooth. Especially that fish and peas is one of the popular risotto combinations, not even mentioning mushy peas with fish & chips in UK.

I used frozen peas, but next time I will wait for this lovely summer, sweet peas. Under any circumstances do not use tinned peas. It is something completely different story. (inedible for me)


2 smoked rainbow trout fillets, roughly chopped, skin off
400ml peas, defrosted slowly in a sieve
half lemon juice
handful of fresh mint (optionally few extra leaves for garnishing)
tsp fresh thyme, leaves picked (I used lemon thyme)
few tbsp mild olive oil
salt
freshly ground black pepper

Place all the above in a food processor and whiz until smooth or up to your taste. I served it with toasted wheat - rye bread slices and garnished with some fresh leaves.

Wednesday, 23 March 2011

Red lentil hummus


One, two, three. Two... Hummus today! A different one and some of my memories of classic hummus.

When I was still on a university together with a group of my friends we planned our holiday, on Polish seaside. Two of us tried to get fitted and get rid of some excess of fat so we were biking every night, sweating and burning calories. After one of my sessions I asked my friend if he would like to eat anything. He look puzzled: eating after we managed to burn some calories? I have explained to him that I have an excellent rye wholemeal bread and some hummus, so we will be nice and healthy mealafter our workout. I have been making hummus for many years so at that time I didn't realise that somebody can actually not recognize this dip. He didn't and looked at me like I was trying to poison him. I explained to him that it is a dip made with chickpea. The laughed his head off! He simply though the word chickpea is very funny. Anyway... He had some and enjoyed it, I have to ask him if he still thinks that chickpea is funny word. For sure he is not a hummus virgin anymore.

This hummus is made with red lentils and is as delicious as a chickpea one. Perfect for using some cooked leftovers of lentils.


200g red lentils
juice of two limes
tsp of ground cumin
1/2 tsp ground chilli
1/4 tsp turmeric
tbsp tahini paste (I used dark one)
3 tbsp groundnut oil
salt

Cook the lentils accordingly to producer's instructions, drain and leave it to cool down.

Place all of the ingredients in a food processor and whiz until smooth.

Store in a fridge in an airtight container. It is better to chill it before serving and it can be quite runny just after whizzing and it has nicer consistency after chilling.

Sunday, 20 March 2011

Tuna & sundried tomato pâté


I love pátés and dips. I think my favourite one is hummus that I showed you already, also because I can incorporate different extra ingredients to the basic recipe and develop so many different flavours.

In the last few weeks I had some dips and pátés that I like very much and make them quite often, sometimes I change herbs and spices and discover new versions of old favourites.

One, two, three. Today the first one.


185g tinned sustainable tuna (preferably steaks)
2-3 tbsp olive oil (optional, no need of oil if you use tuna in oil)
handful of fresh parsley
6-8 sundried tomato halves (dry or in oil)
level tsp of tomato pure
tsp of lemon juice
1/4 tsp ground chilli
some freshly ground black pepper

I used dried tomatoes so I soaked them in hot water until softened. They are quite salty so I didn't need extra salt.

Place all of the ingredients in a food processor and whiz until smooth.

Keep refrigerated in an airtight container.

Wednesday, 12 January 2011

Five or less ingredients #4


Previously in this series:

#1 Series rules and pork stir fry in caramel sauce

#2 Salmon baked with fennel and black olives

#3 Tagliatelle with courgettes & sun blushed tomatoes

Right, I think it is time to come back to 5 or less ingredients series, and this time I will show you something lighter for a change. Something for light lunch, perhaps a starter, or a snack, when you fancy something nice and not too big. Accordingly to series rules (that you can find in the first post of this series) I have excluded salt and pepper from the list of ingredients.

For the first time I mixed avocado with blue cheese but I have to say it works for me. Well for both of us. However next time I will try to mash the cheese together with the avocado and make smooth dip and see if it works well too.


Avocado & blue cheese bites

Serves 2-3


2 ripe avocados *
zest and juice of one lime
4-6 slices of baguette (you can use stale one – toasted or grilled)
some crumbled blue cheese (I used Blue Stilton)
salt
freshly ground black pepper

Hold the avocado in one hand and use a sharp knife to cut it in half around the stone. Twist one half to release it from the stone and set aside. Hit the stone with a large sharp knife, and then twist the blade - the stone should come out of the avocado when you pull the knife away. Remove the flesh with a spoon and place in a mini chopper or finely smash with a fork. Add lime zest and juice, salt, pepper and process until smooth. Smear the avocado paste over the bread slices, crumble some cheese on the top and serve.


* quite often you can’t get really ripe avocados in the shops so buy some in advance wrap it in a paper or newspaper and leave it in room temperature for 2 days or so.

Thursday, 28 October 2010

Smoked mackerel páté


I was not so keen to try any fish páté since I had trauma from my childhood when somebody fed me with fish pate on a summer camp. It was made from... I do not know and I prefer not to. Sometimes ignorance is bliss. However some time ago I saw smoked mackerel and I had to buy it. I did not know what I am going to make, but it was one of those moments that I could not resist the feeling of buying something.

I found a lovely recipe from Jamie Oliver on Daily Mail website, but I am unable to find it at the moment, I think it was removed. It was a Christmas party crowd pleaser and he made a huge amount of it, so I decided to make half of it. Few days later I rushed to the local market to get some more smoked fish. It was the best mackerel páté I have ever tried.

I have to admit I hesitated for a moment with a horseradish, so I added half of it but after I tasted it I decided to go for the whole amount because it was the horseradish that gives it a special kick.


I used the following quantities, but if you planning a party, do not hesitate to double it.

400g smoked mackerel
190ml soured cream
3 tsp horseradish
zest and juice of one lemon
big handful of fresh parsley, chopped
freshly ground black pepper

Remove skin from the mackerel and mash the flesh with a fork. Add cream, horseradish, pepper, most of the lemon zest, whole lemon juice and most of the chopped parsley. Mix it all together.

Serve on slices of grilled read, topped with some parsley and lemon zest.

Thursday, 21 October 2010

Harissa


Few years back when I use to read about standards required in Michelin stars restaurants I was bit shocked. But then after few years I totally understand why all of those standards are so high. I use to think that chopping vegetables into equal pieces or spending time on making your own pastry is a bit of a waste of time and called it quite obsessive.

Professional Michelin inspectors anonymously visit restaurants evaluate them on a range of criteria. If they are impressed by a restaurant, they visit the establishment again. And again. Quite an obsessive research, isn’t it? This actually makes the Michelin stars restaurants such a reliable place to eat. No matter what the occasion, time of the year you will always find the best food in those places. Also, I believe that you will remember this meal for long…

It is not only the prestige of the place that comes with Michelin stars but also a big money – the restaurants can be fully booked months in advance.

Now after few years of cooking at home, learning new skills, tasting menus from different chefs I know exactly that those small things make a huge difference. These things are taking dishes to the new exciting level.

I know that sometimes it is difficult to find time to make your own puff pastry, pesto or real stock and we use some bought, ready – made. It is OK, but it certainly brings the taste down. No matter how expensive the stuff from the shops is, the homemade one is always better.

Call me snob, or obsessed but I prefer to make my own pesto, pastry or stock. This is what makes my guests think “WOW” when they try my dishes. Perhaps this is something that you cannot name, you are not sure what it is, but you can tell that it makes big difference to the taste. It is important for me, because I eat not only to satisfy a hunger…

Taking all the above into a consideration I stopped buying ready made harissa and made my own, that was much better than any from a jar that I tried before. This hot chilli sauce is commonly eaten in North Africa and Middle East. It is great with any meat dish, if you like hot dishes, excellent with veg too – especially with lentils or beans dishes.


From “Good Food”, September 2010 issue

Makes about 5 tablespoons


10 fresh red finger length chillies
1 ½tsp coriander seeds
½ tsp cumin seeds
½ tsp caraway seeds
3 garlic cloves, peeled and roughly chopped
½ sea salt, preferably flaked
2 tsp tomato puree
2½ tsp lemon juice
1 tbsp olive oil (mild, not extra virgin, as it will overpower the taste of other ingredients)
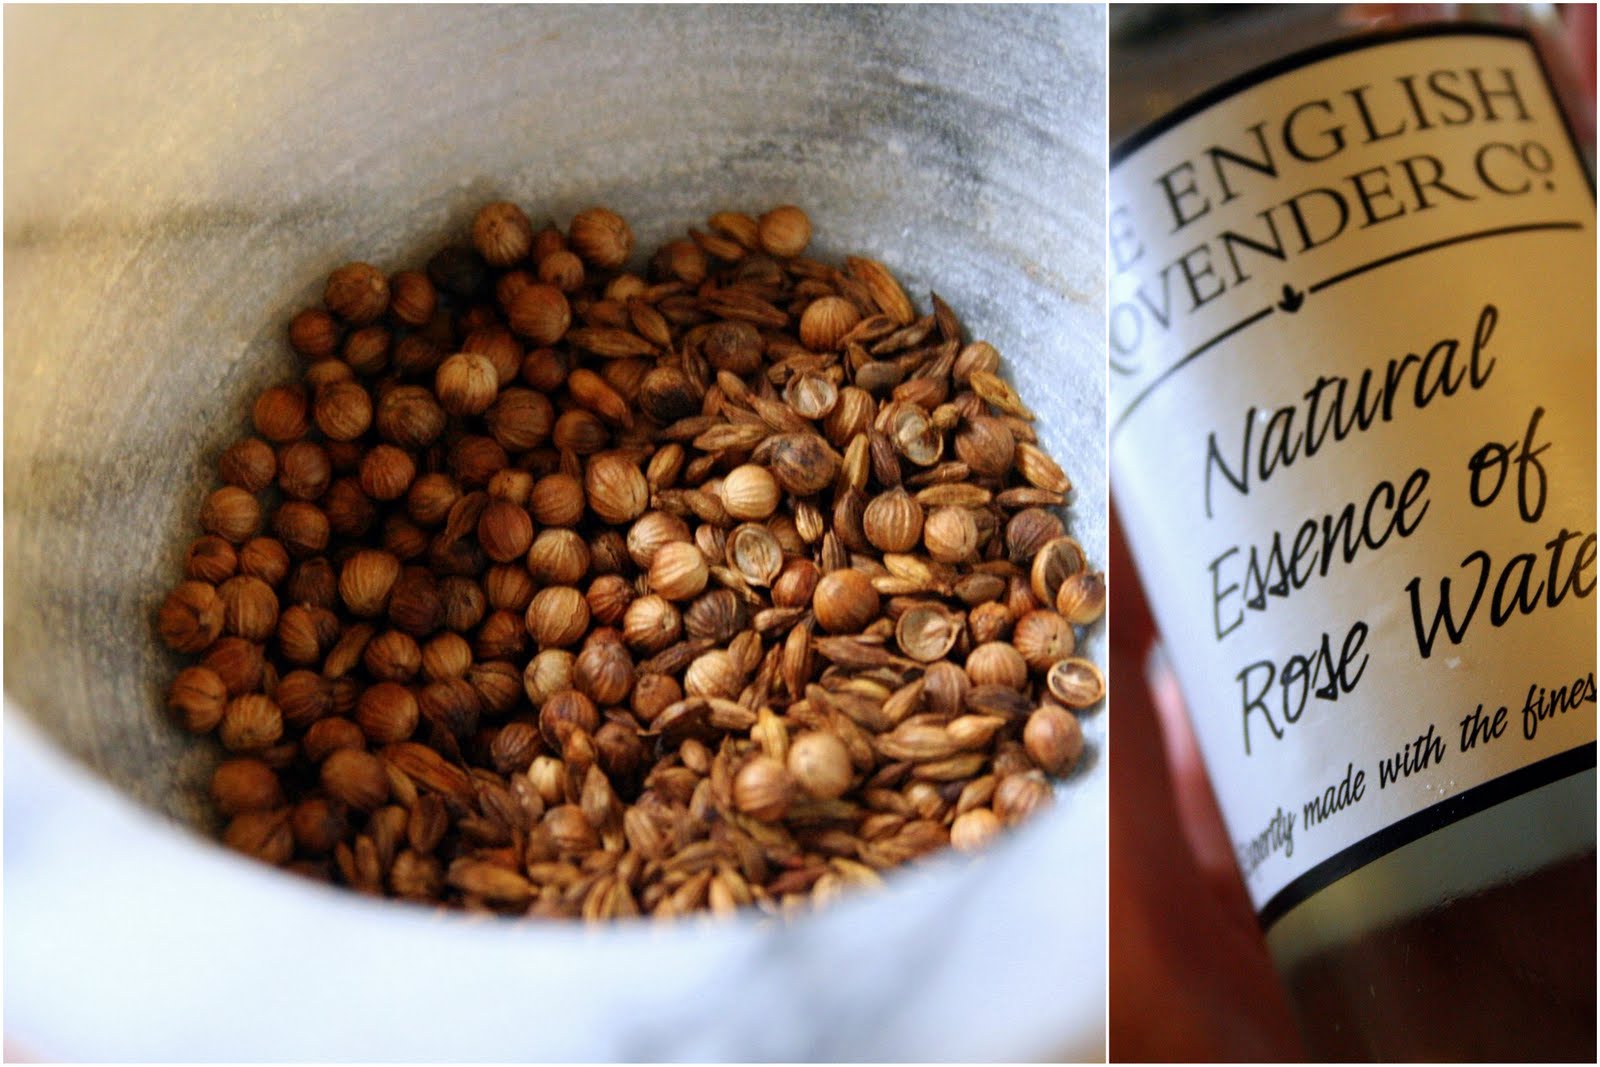
7 drops rose water (optional, but highly recommended!)

Place frying pan over a medium heat and char the chillies turning them now and then until fairly blackened and covered in “blisters”. Remove from a pan, place in a plastic bad, seal it and leave it to cool down slightly, for about 10 minutes.

In the same frying pan over a low heat gently toast the cumin, caraway and coriander seeds, for about 2 minutes, tossing them, until fragrant. Place in a mortar and smash with pestle.

Peel away the skins from chillies and deseed them. I recommend you use a latex gloves or wash your hands with oil and then with water and soap to avoid any nasty consequences (especially man – do not be tempted to do this job and go to the toilet without washing your hands carefully). Capsaicin from chillies is hydrophobic, so you cannot wash it away using water, but you can do so using alcohol or oils. This is why you should rub some oil into your hands before washing them with water and soap.

With a pestle and mortar pound the chillies, spices, garlic and salt together until as fine as possible. Stir in tomato puree, lemon juice and rose water and allow flavours to combine for at least one hour before using.

Unfortunately the magazine did not tell us how long we can keep this refrigerated. I am keeping mine for 2 weeks now and everything looks and tastes OK. I would think it will last long if covered with layer of oil. I would try to freeze it in ice container, to make small cubes – each for single use.

If harissa is to hot for you make it milder by adding more olive.

Friday, 18 June 2010

Hummus, flatbreads & review


As I mentioned few days ago I had the opportunity to test Kenwood Compact FP120 Food Processor (1.4 Litre). I use to have a proper, big machine, with an extra jug but it broke down twice and did not want it again. This is the reason why I have decided to get smaller one. I do not need a food processor to make the dough, as I use bread machine and I am happy with it. I do not need a jug, as I use a hand liquidizer. I needed new food processor to make bread crumbs, hummus or other dips, grating and slicing. I am extremely happy with my Kenwood mini chopper which I bought over a year ago and use it on everyday basis and it is still working fine, so I decided to get one of their food processors, but the compact one.

It comes with a blade, spatula, coarse grating and slicing attachment, whisker and a citrus press. There is only one thing that I will possibly miss – a fine slice and grate disk. It is dishwasher safe and it has a non slip feet. One speed and pulse work great for me.

I have used it for grating and slicing the veg and making hummus so far and all was working fine.

If you are used to bigger, better machines you will probably be disappointed but I think it is a little gem in the kitchen – cheap but cheerful, small, not too heavy and it takes up very little room on the work surface and storage. You should not expect it to do the same job as the more expensive options - clearly this is not for heavy duty work, but for small amounts it works fine. It is ideal for cooking for two. Possibly would be too small for family of four or more.

***

Now I tell you how we made ourselves feel like on Mediterranean Sea holiday again in the middle of Yorkshire. I am extremly happy with the weather in June, except from few days of rain we had really nice and warm days so far.

All we needed was a patio set, good wine and simple to make and tasty food to enjoy our evening. Especially we have a lot of fresh herbs in a huge clay pot and some lavender in the patio, so we did not need anything else. Perhaps we missed a warm sea breeze.


Basic hummus (quick version)

Serves 2-4

400g tinned chickpea, drained
tbsp tahini paste (I used dark one)
juice of one lemon
garlic clove (optional)
olive oil
chilli powder (optional)
salt

Place the chickpea, tahini, lemon juice, garlic and salt in a food processor and blend until thoroughly mixed and smooth at the same adding some olive oil to make it nice and smooth. If you prefer low fat option use some water from a tinned chickpea, but surely a good quality olive oil makes real, tasty hummus.

Place in serving bowl, and create a shallow well in the hummus. Add a small amount (1-2 tablespoons) of olive oil in the well and sprinkle with chilli powder (optional). You can also garnish with some fresh herbs.

We had it with some homemade flatbread (Nigella Lawson’s recipe from “How to be a domestic goddess”), olives stuffed with sun dried tomatoes and some Spanish wine. Lots of wine… Isn’t a perfect dinner on a lovely summer night?


Flatbreads

Makes 6

For the dough:

500g strong white bread flour
7g (1 sachet) dried yeast
2 tsp salt
2 tbsp plain yoghurt
2 tbsp olive oil
approximately 300ml warm water

For the glaze:

1 large egg (I skip the egg)
1 tsp water
1 tsp plain yoghurt
nigella seeds to sprinkle


Place all the ingredients in a bread machine and use the “dough” programme. If you do not use the machine, combine the flour, yeast and salt in a large bowl and make a well. Dollop the yoghurt and oil into a jug and add warm water. Give a quick beat with a fork to combine, then pour this liquid into the dry ingredients, and mix with your hands or a wooden spoon, adding more liquid as needed, to form a firm but soft dough.

Turn out onto a floured surface and start kneading. Add more flour as needed until you have got smooth and elastic dough. Form the dough into a ball and place in an oiled bowl. Cover the bowl with cling film or clean cloth and leave to rise for about an hour or so, until doubled in size. Remove the dough from the bowl or machine, punch down.

Divide the dough into 6 equal pieces. Form each of these 6 little pieces into an egg-shape and, one by one, roll them out to make them flat. Place on baking tray lined with some baking paper, cover with tea towel and leave to prove for 20 minutes, until puffy. Preheat the oven to 220ºC.

Beat the egg with the water and yoghurt – sometimes I skip the egg and use water and yoghurt only. Using a pastry brush, paint this over the breads. Sprinkle on the nigella seeds and bake in the hot oven for 8–10 minutes - the flatbreads should be golden.

Remove them from the oven and wrap immediately with a tea towel so that these breads do not dry up and get too crusty.

These are also beautiful next day reheated under a hot grill.

Thursday, 1 April 2010

Chicken, orange and caramelised shallots páté & roasted beetroot and horseradish relish


For páté
(makes a large loaf tin or two small loaf tins)


1kg chicken legs
2 small carrots, peeled
few celery stick
3-4 dried porcini mushrooms
5-6 whole black peppercorns
1 bay leaf
2-3 whole allspice
300g pork or chicken liver, cut into 2 inch pieces
approx. 30g butter
300g boneless streaky pork, cut into 1.5 inch pieces
2 shallots, peeled and finely chopped
pinch of sugar
zest of one orange (make sure you zest the orange part only, the white one is bitter)
stale white bread roll
50ml brandy
pinch of freshly grated nutmeg
salt
freshly ground black pepper
3 eggs
10-12 thinly cut slices of streaky bacon or pork back fat

Place chicken legs in the pan together with the carrot, porcini mushrooms, celery, allspice, peppercorns and bay leaf. Cover with water and simmer over a low heat for about 1.5 hour.

Fry the liver in the half of butter in the pan until browned, remove from a pan and place in a bowl.

Using the same pan fry streaky pork pieces without any extra fat until slightly browned. Remove from the pan and place in the bowl together with liver.

Still using the same pan fry the shallots in the remaining butter over very low heat, until caramelised but not browned. Add pinch of sugar for last 5 minutes of frying.

Drain the chicken legs together with vegetables. Save the carrots, peppercorns, porcini mushrooms, and let chicken to cool down slightly. Remove the skin and bone the chicken. Place meat together with orange zest, carrots, mushrooms, peppercorns in the bowl together with liver and pork.

Soak bread roll in some stock that was produced when cooking chicken, remove any excess of liquid and place in the bowl.

Mince all the ingredients three times using meat mincer, season with salt, pepper and nutmeg, add brandy, egg yolks and mix thoroughly with your hands.

Whisk the egg whites with pinch of salt until they stiff and fold gently into the meat mixture.

Line big loaf tin with bacon or slices of pork back fat, so they slightly overhanging the tin, fill it with a meat mixture, level with a spatula and cover with the overhanging bacon.

Cover the tin with a kitchen tin foil, place in bigger dish filled with hot water (about ¾ of the size of the loaf tin). This is called bain-marie, which is a type of preparation used for protecting dishes requiring gentle heat from the fierce heat of the oven.

Bake for 1.5 hour in preheated oven (180C), uncover and bake for further 10 minutes until the top is golden. Remove from the oven, let it cool down and leave in the fridge overnight before serving.

It goes very well with some homemade beetroot and horseradish relish.


For relish
(makes 2 x 200ml jars)


8 small beets, roughly the same size
1 tbsp olive oil
salt
freshly ground black pepper
few drops of lemon juice
about 8cm piece of fresh horseradish

Place washed unpeeled beetroots in ovenproof dish, drizzle with olive oil and bake for about 40-60 minutes, or until soft in 180C, and then leave it to cool down.

Peel the horseradish and finely grate in a food processor. You can use grater but it will upset your eyes and nose.

Peel beets, grate finely and mix with horseradish, lemon juice. Season with salt and pepper and leave it in the fridge overnight. After night in a fridge it will not be as sharp and hot, so you can add some more horseradish and leave it to rest for another 12 hours.